You Don’t Knead It but You Need It
So, you all know I’m just a little obsessed with bread, especially the home-made kind. I make batter bread on a regular basis because it can be mixed, raised and baked off on a work night for amazing breakfast possibilities the next day. I also like that the kneading step for batter bread is accomplished by my electric mixer, as my kitchen has very little counter space available for hand kneading.
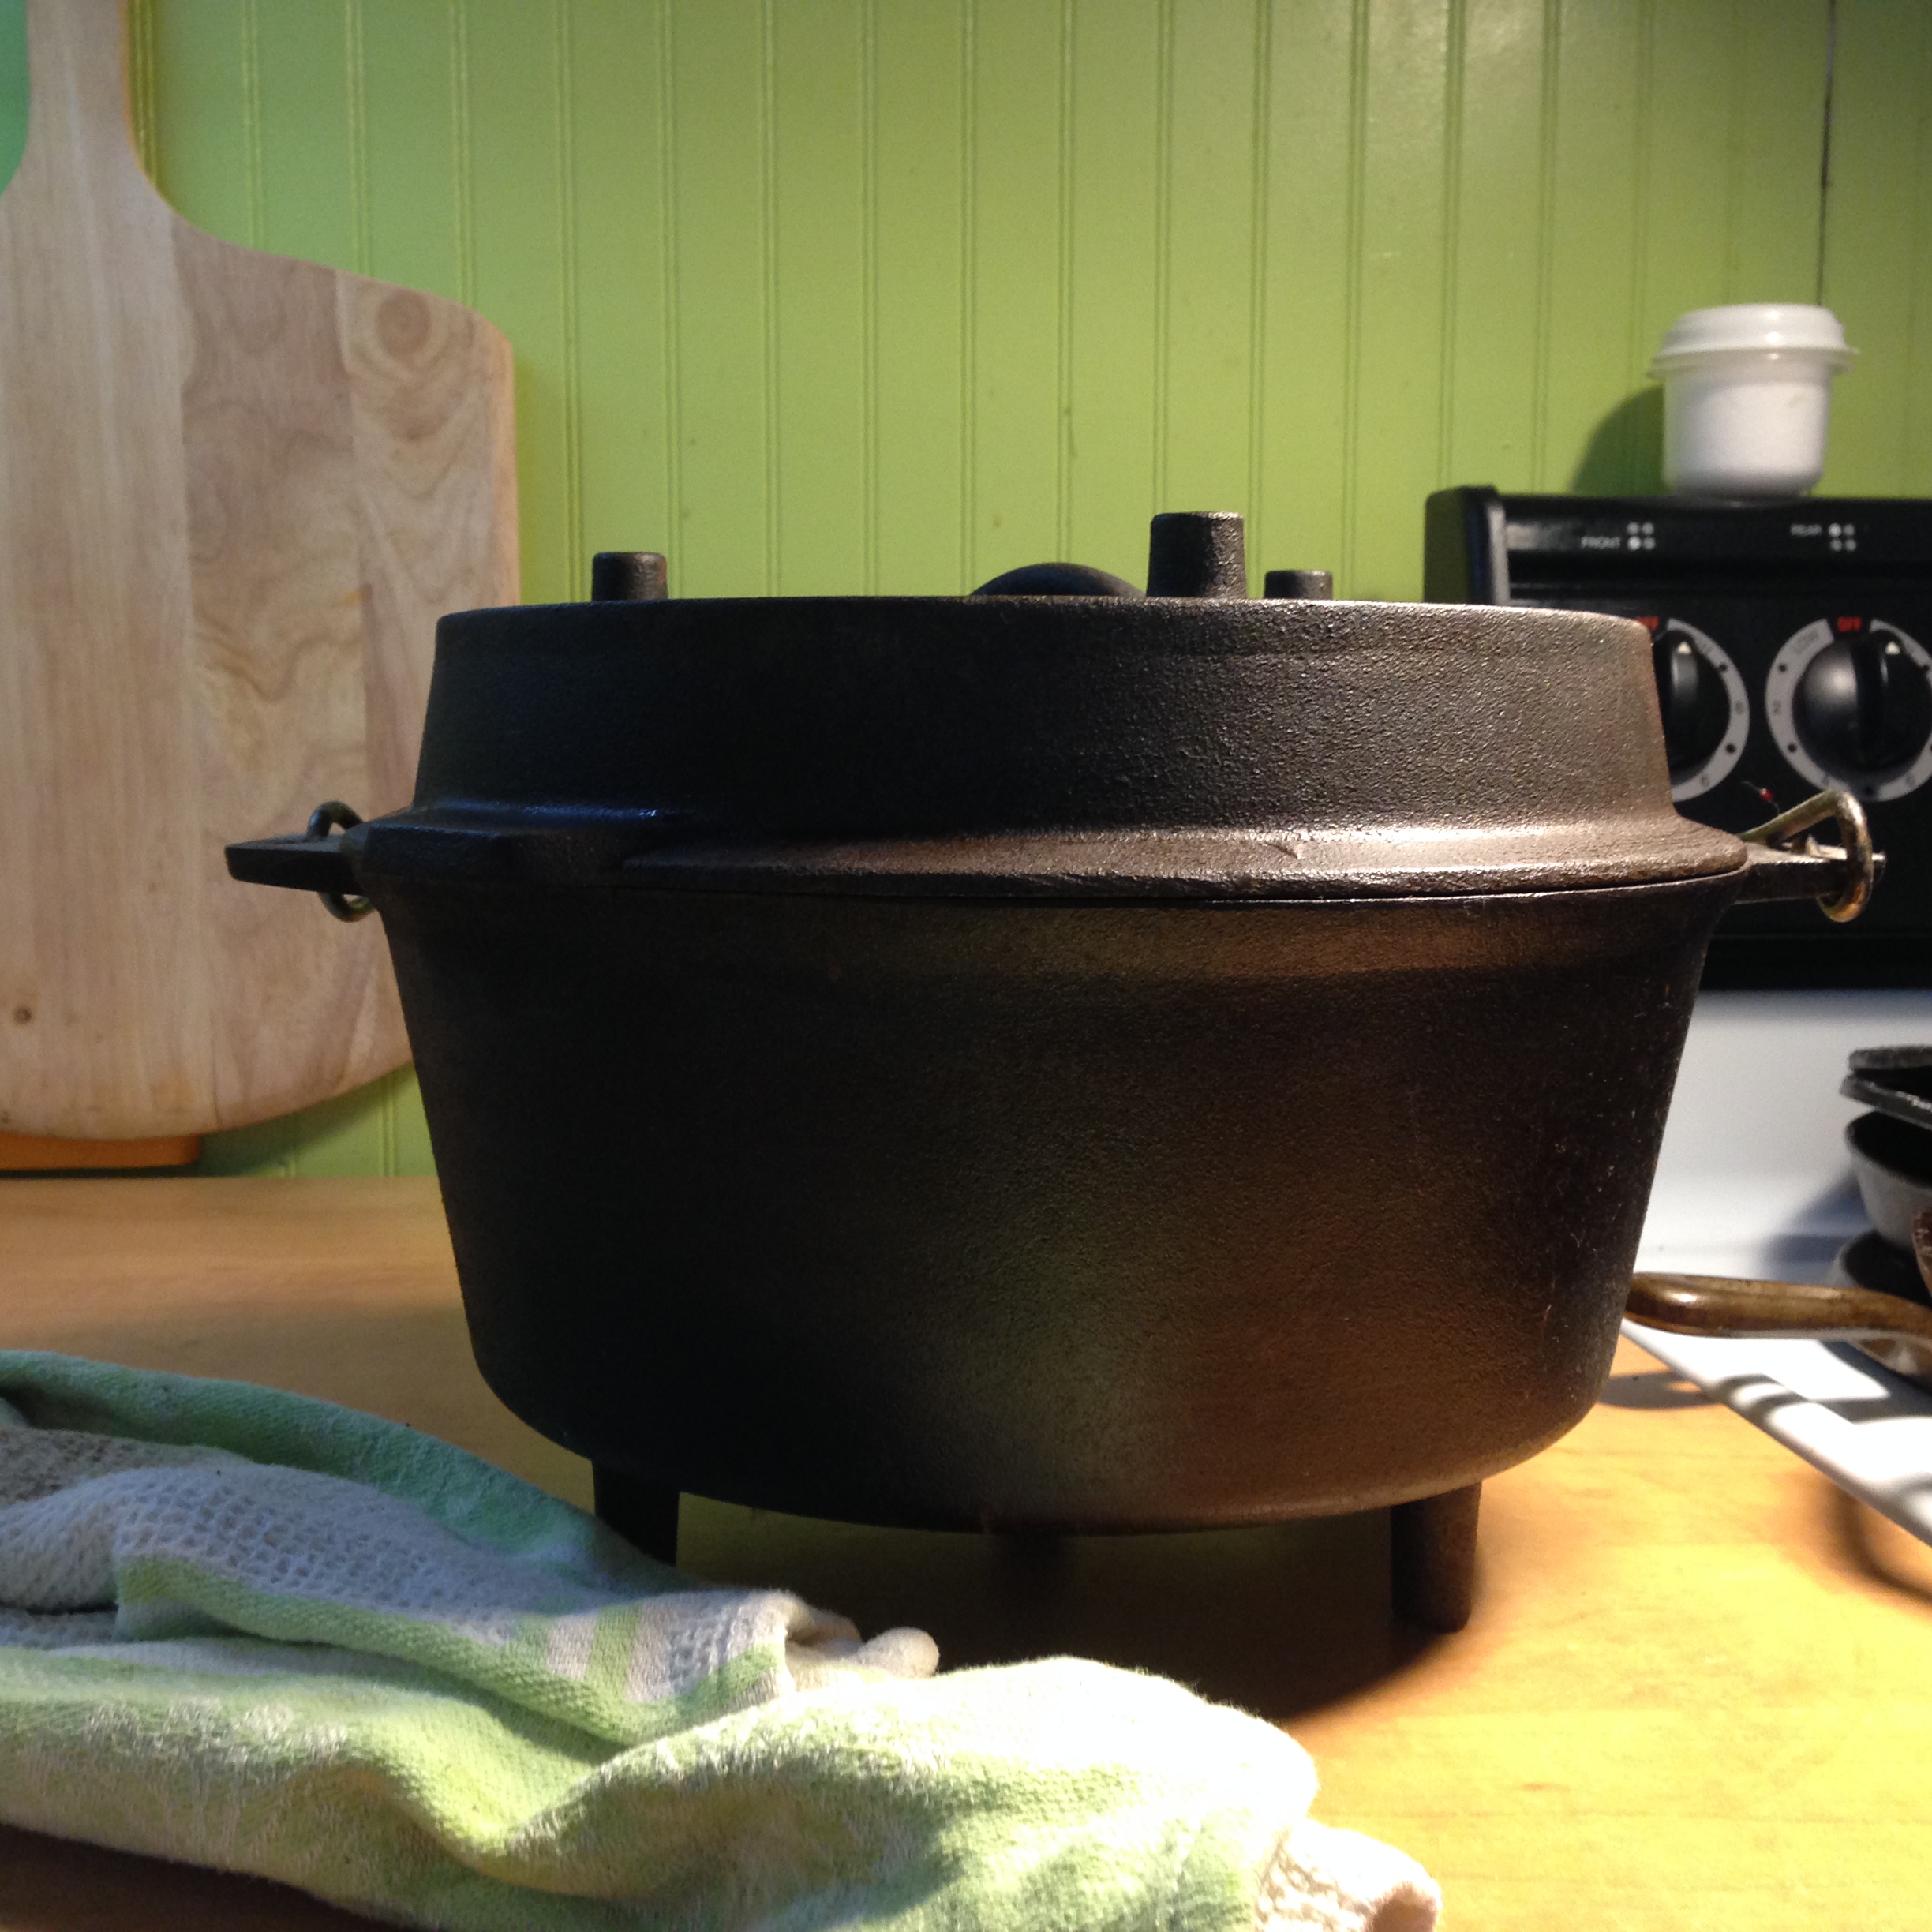
You can not see in the picture but this is actually a limited edition Dutch oven commemorating the 100th anniversary of the Lewis and Clark expedition. That’s what it says embossed on the lid, anyway.
Recently, I came across a really cool instructable by In the Kitchen With Matt. Not only does this bread require no kneading at all, but it uses a kitchen item I wish I could use more frequently- my Dutch oven.
There are two kinds of Dutch oven. There is the refined, modern, super heavyweight lidded casserole dish. These are designed to be used either on a stove top or in an oven and are usually nice enough to go right to the table. They come in all kinds of colors for all kinds of prices. I happen to have the Old School kind of Dutch oven. It is a heavy cast iron pot with little legs that can be put right onto a pile of hot coals for baking in the wild. Or in your charcoal grill. The lid can be inverted into a skillet, even. Again, these come in a range of prices. I got mine in the early 2000’s when I was doing a good bit of camping. To be honest, I do not think it has been used since 2006 although Mr. Food It Yourself re-seasoned it for me about a year ago.
If you are looking to invest in a Dutch oven, consider how much open-fire cooking you would like to do, how much you want to spend and how much you can lift. The cast iron ones, not surprisingly, are really, really heavy. If you are not currently looking to invest in a new piece of kitchen equipment you could certainly make this recipe in your heaviest casserole dish or a cast iron skillet with a lid.
First, make the dough, which takes almost no time at all as there is no need to knead.

This is all it takes to make some seriously yummy bread: flour, yeast, sugar, salt and water.

This recipe uses only half a teaspoon of yeast. Proofing is really important to make sure the little yeasty beasties are awake.
Then, let it rise for 12-18 hours. Yes, that is a big difference from the usual one to three hours of other bread recipes.
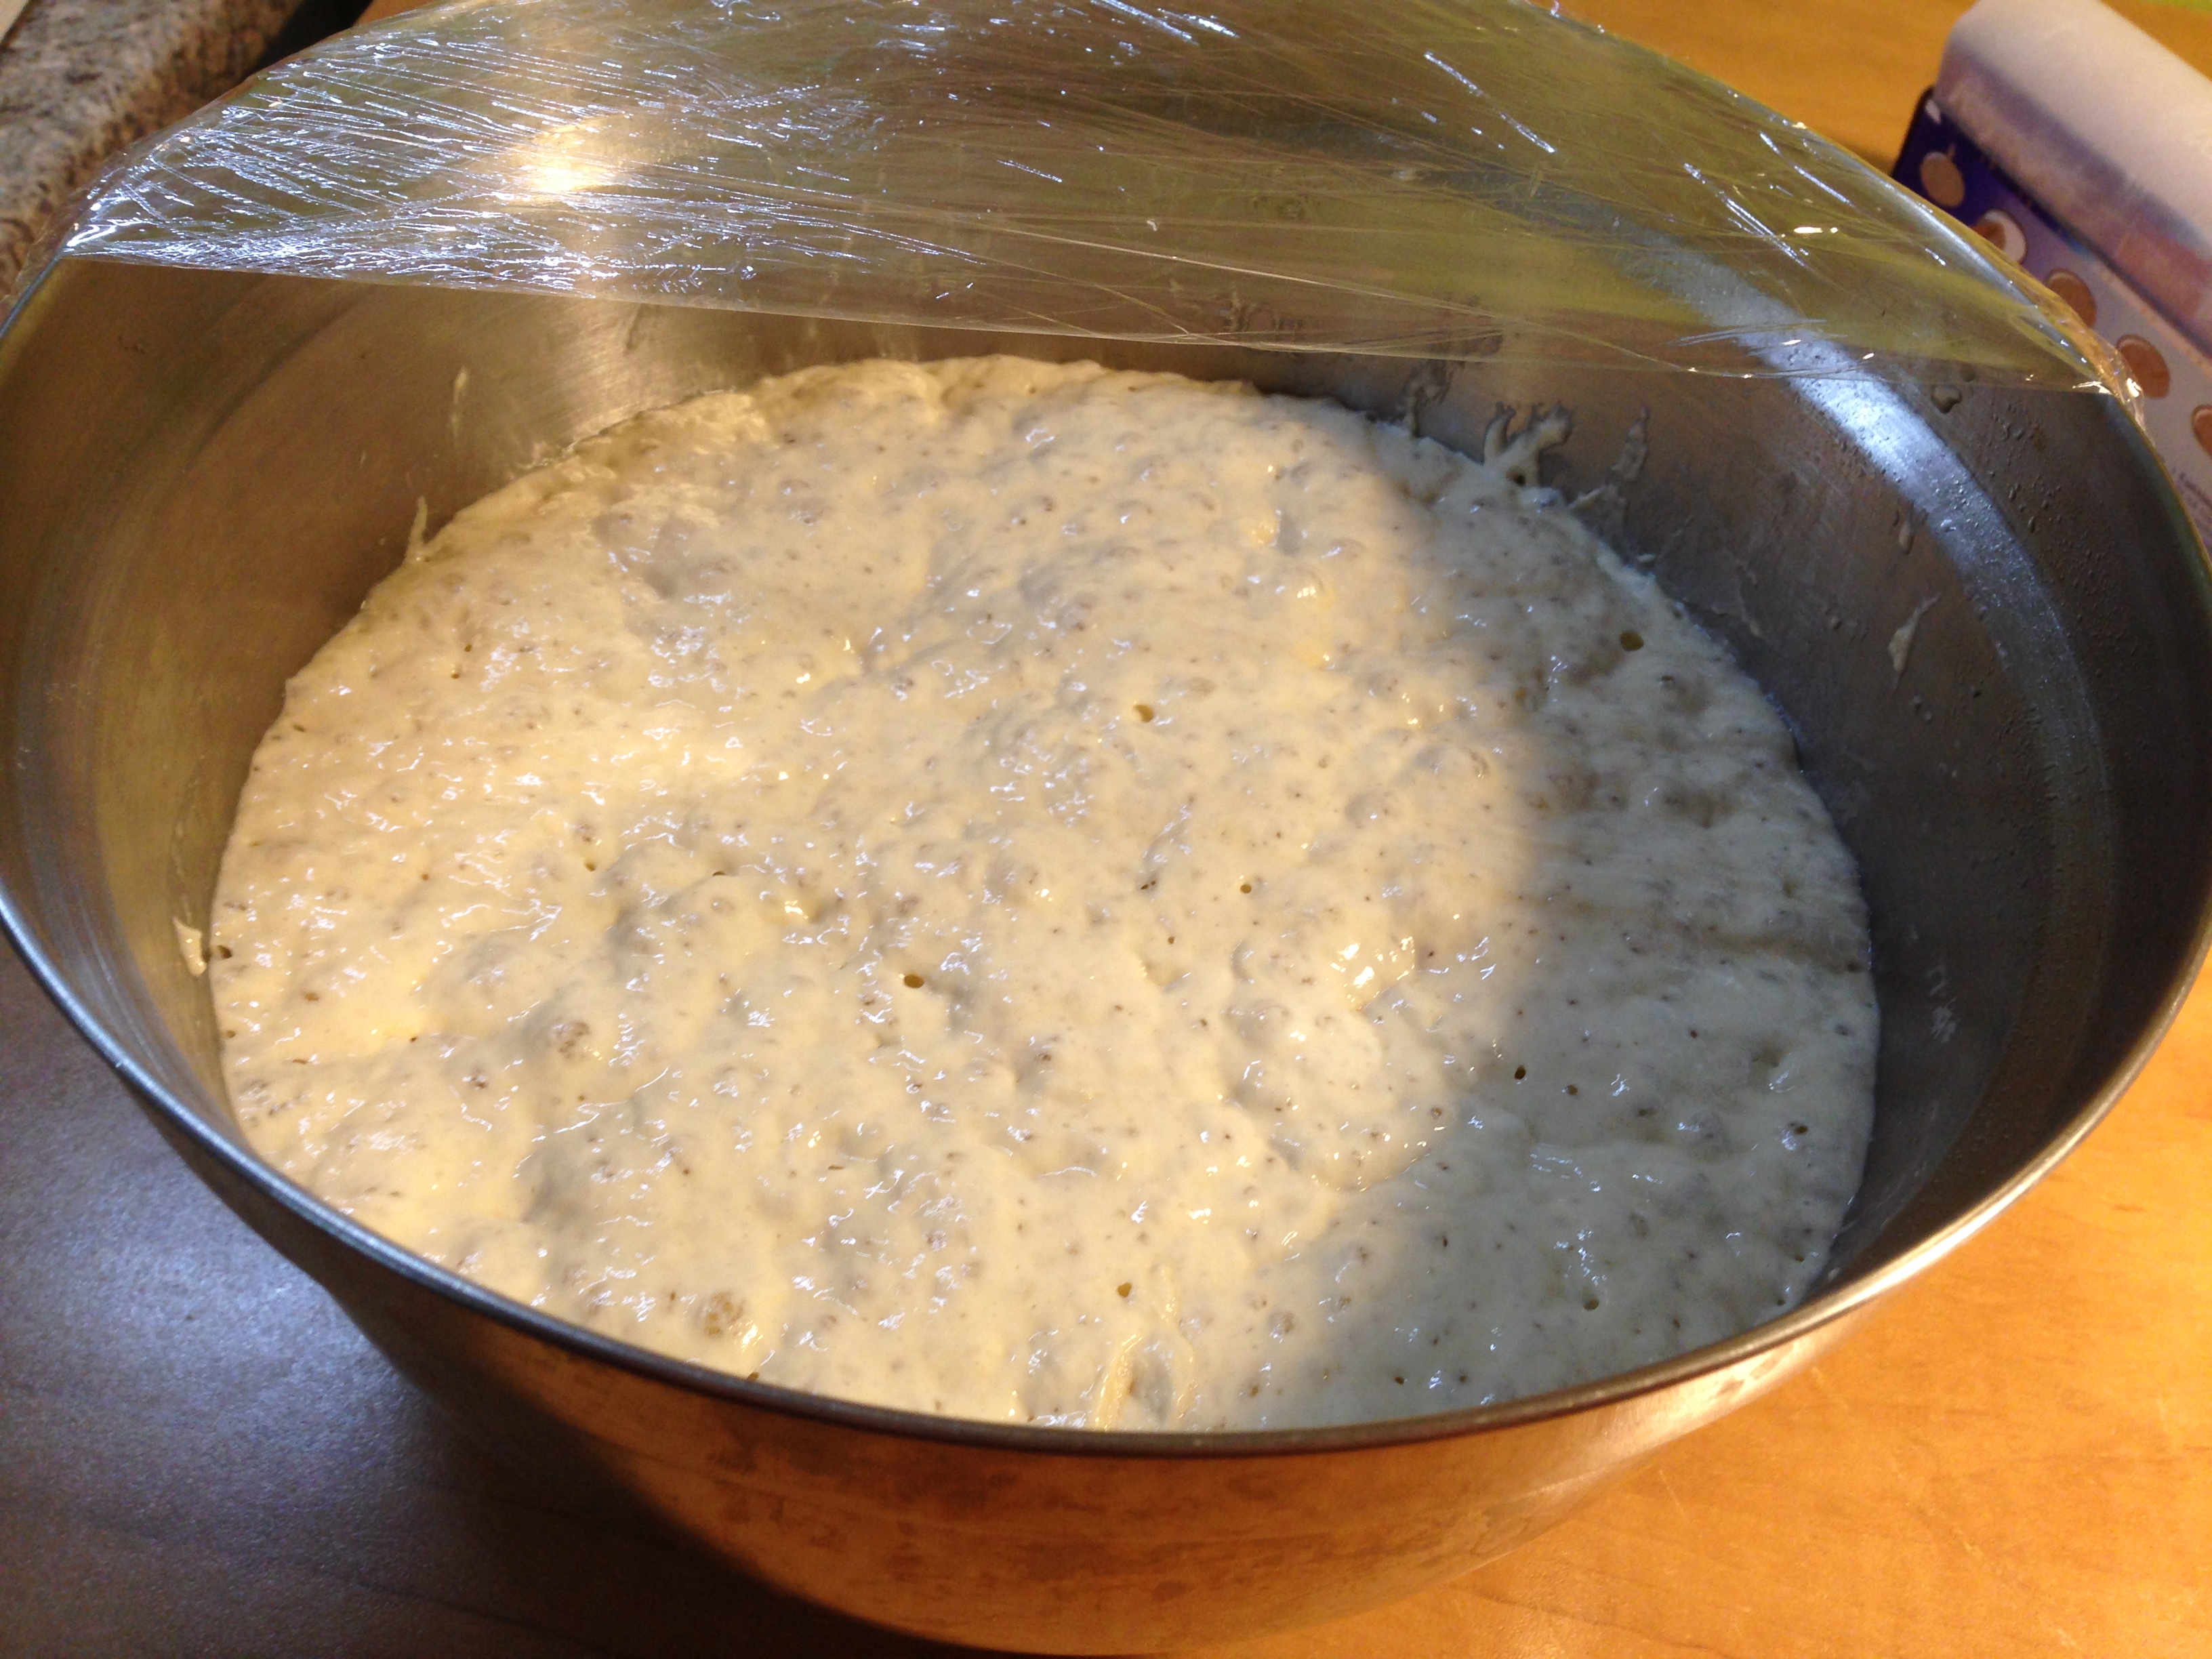
Here is that dough the next morning. There was so much yeast action the bubbles visibly were popping up to the surface.
Next, there is a quick shape-up and a second rise. The tiny amount of yeast in the recipe has now divided and multiplied, so this one only takes about two hours.

Use a lot of flour for this step, both on the counter and on your hands! It is very sticky.

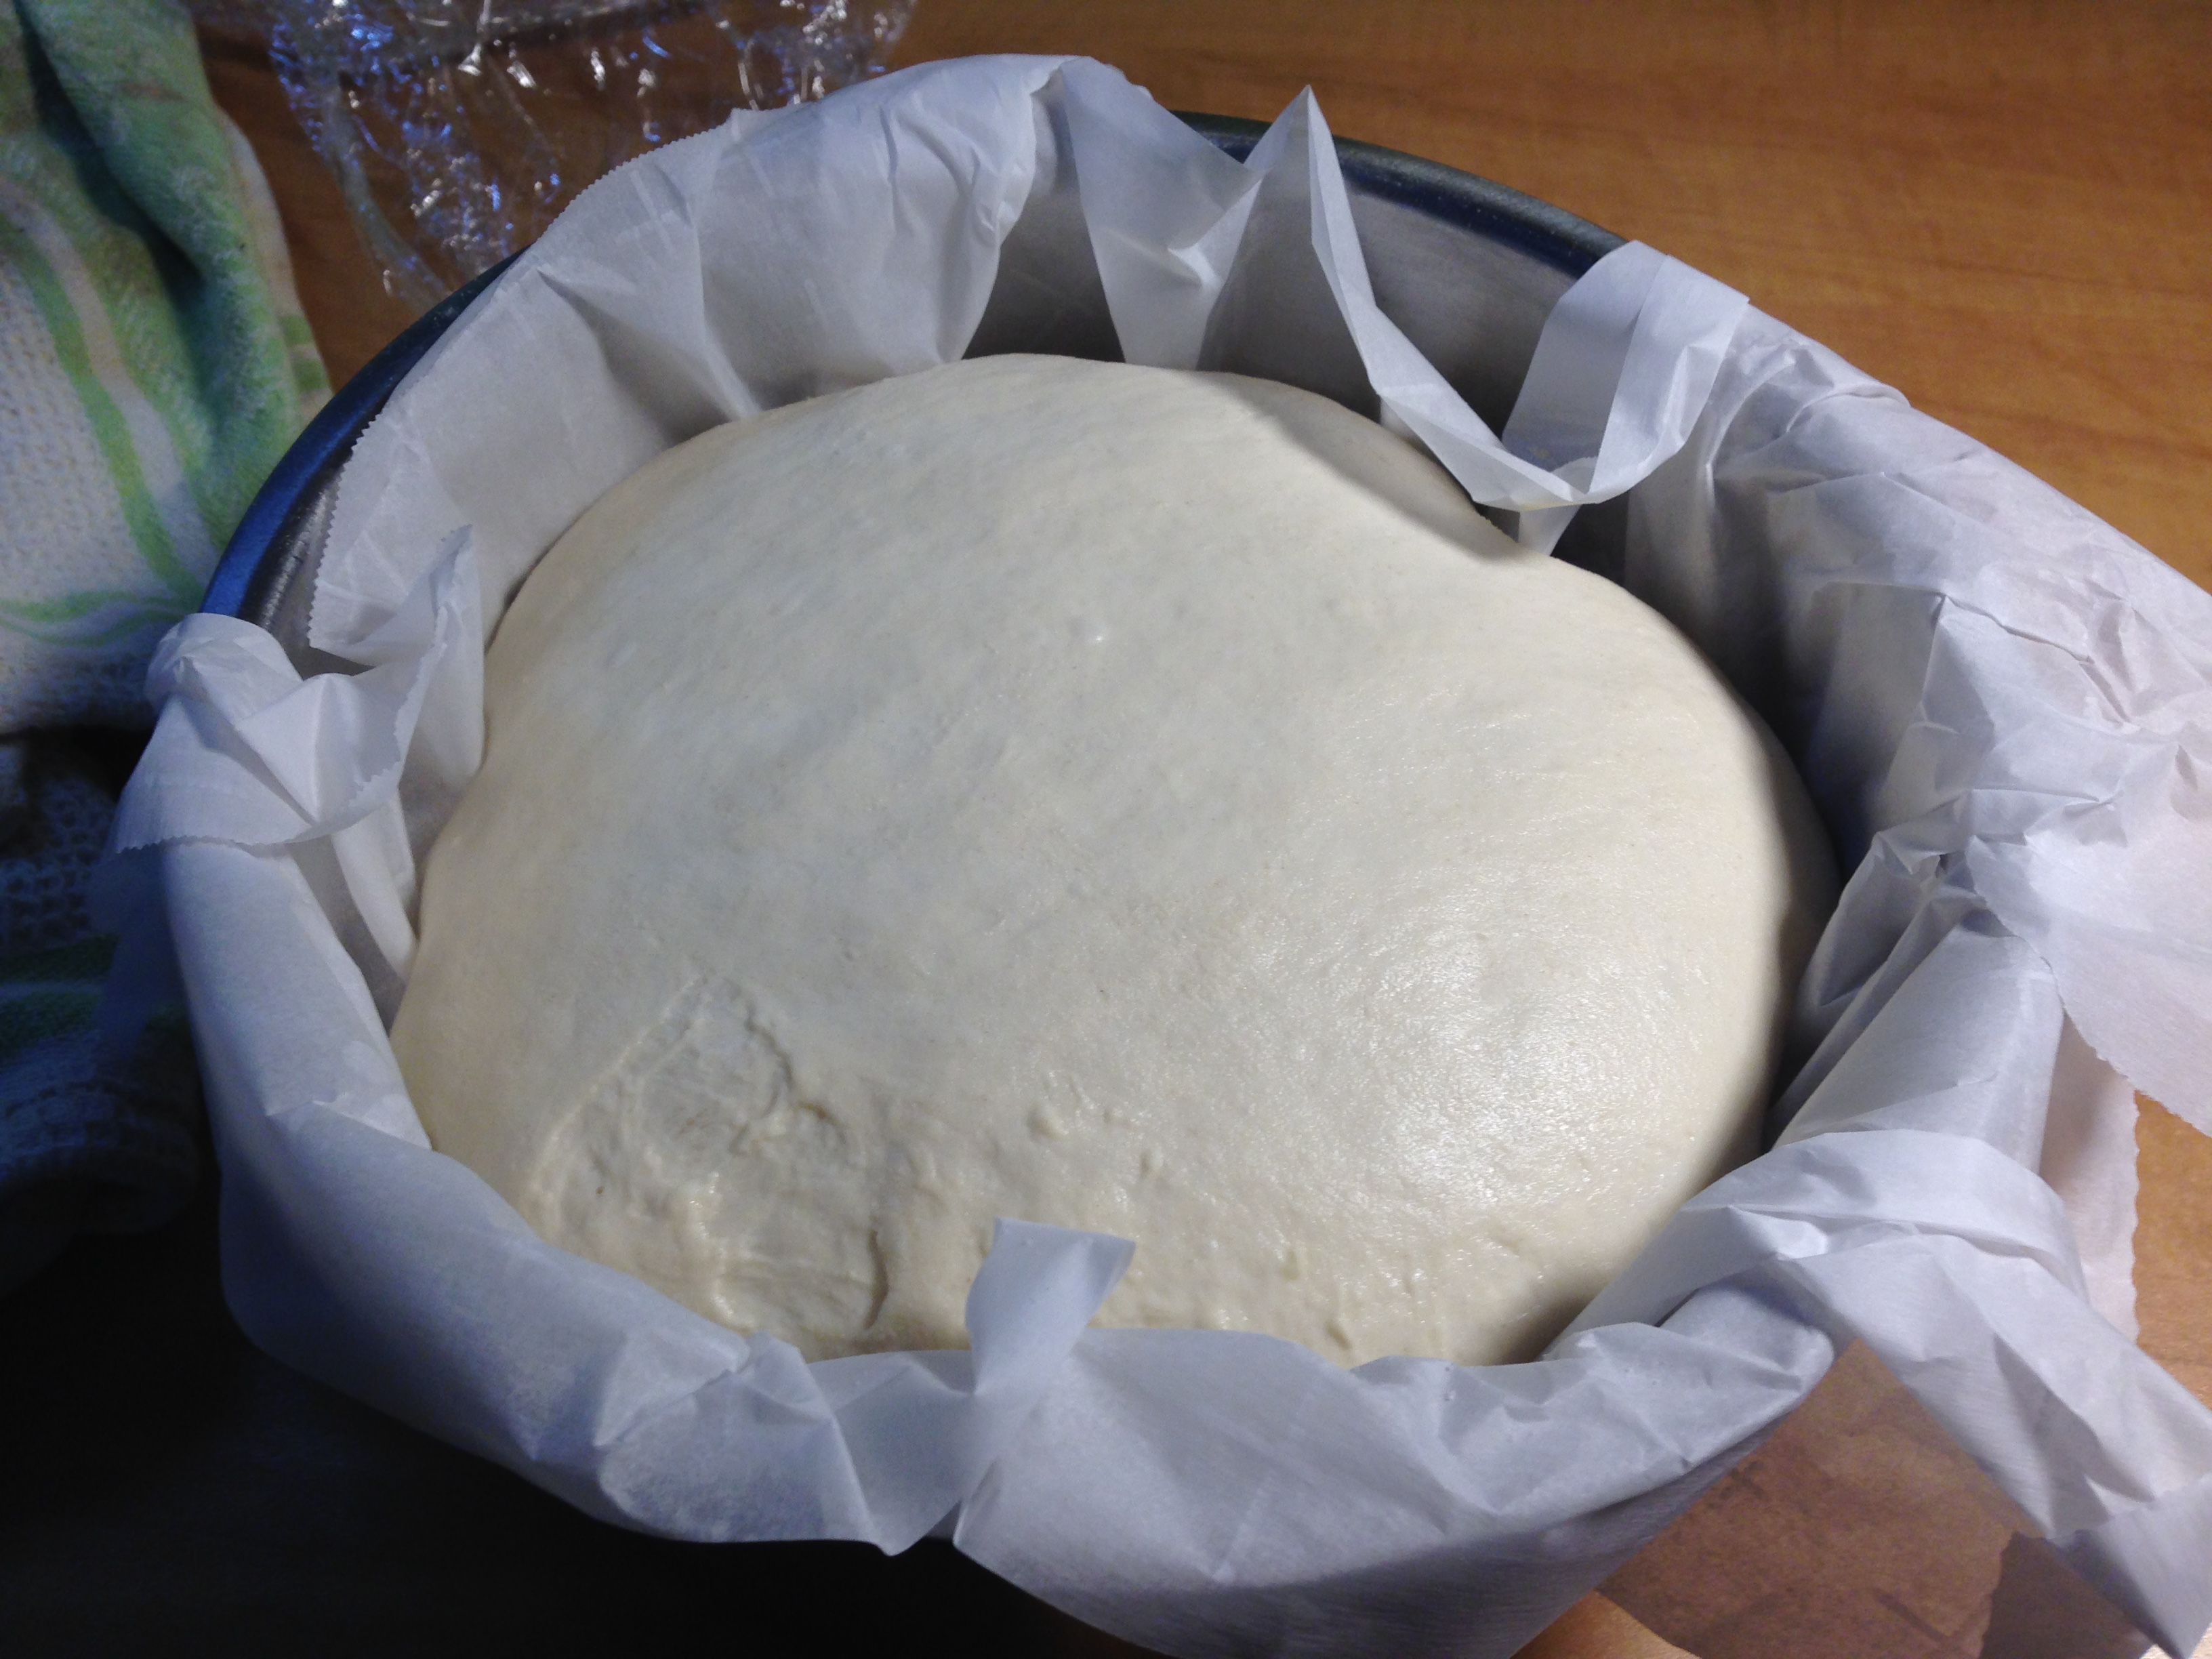
Line your bowl with parchment and sprinkle in some flour or corn meal. I used some coarse semolina flour I had kicking around. Note the parchment sticks up beyond the sides of the bowl. That will be important later.
This is where things get a little tricky. I was thinking I should maybe show this as a video; I am glad I did not, though as a little leftover grease on my Dutch oven created enough smoke to set off my smoke alarm. You have one of those in your kitchen, right?

Heat the oven oven with the Dutch oven inside. When the oven oven has heated, carefully lift the corners of the parchment and drop the dough into the hot Dutch oven. Put the lid on the Dutch oven then close the oven oven.
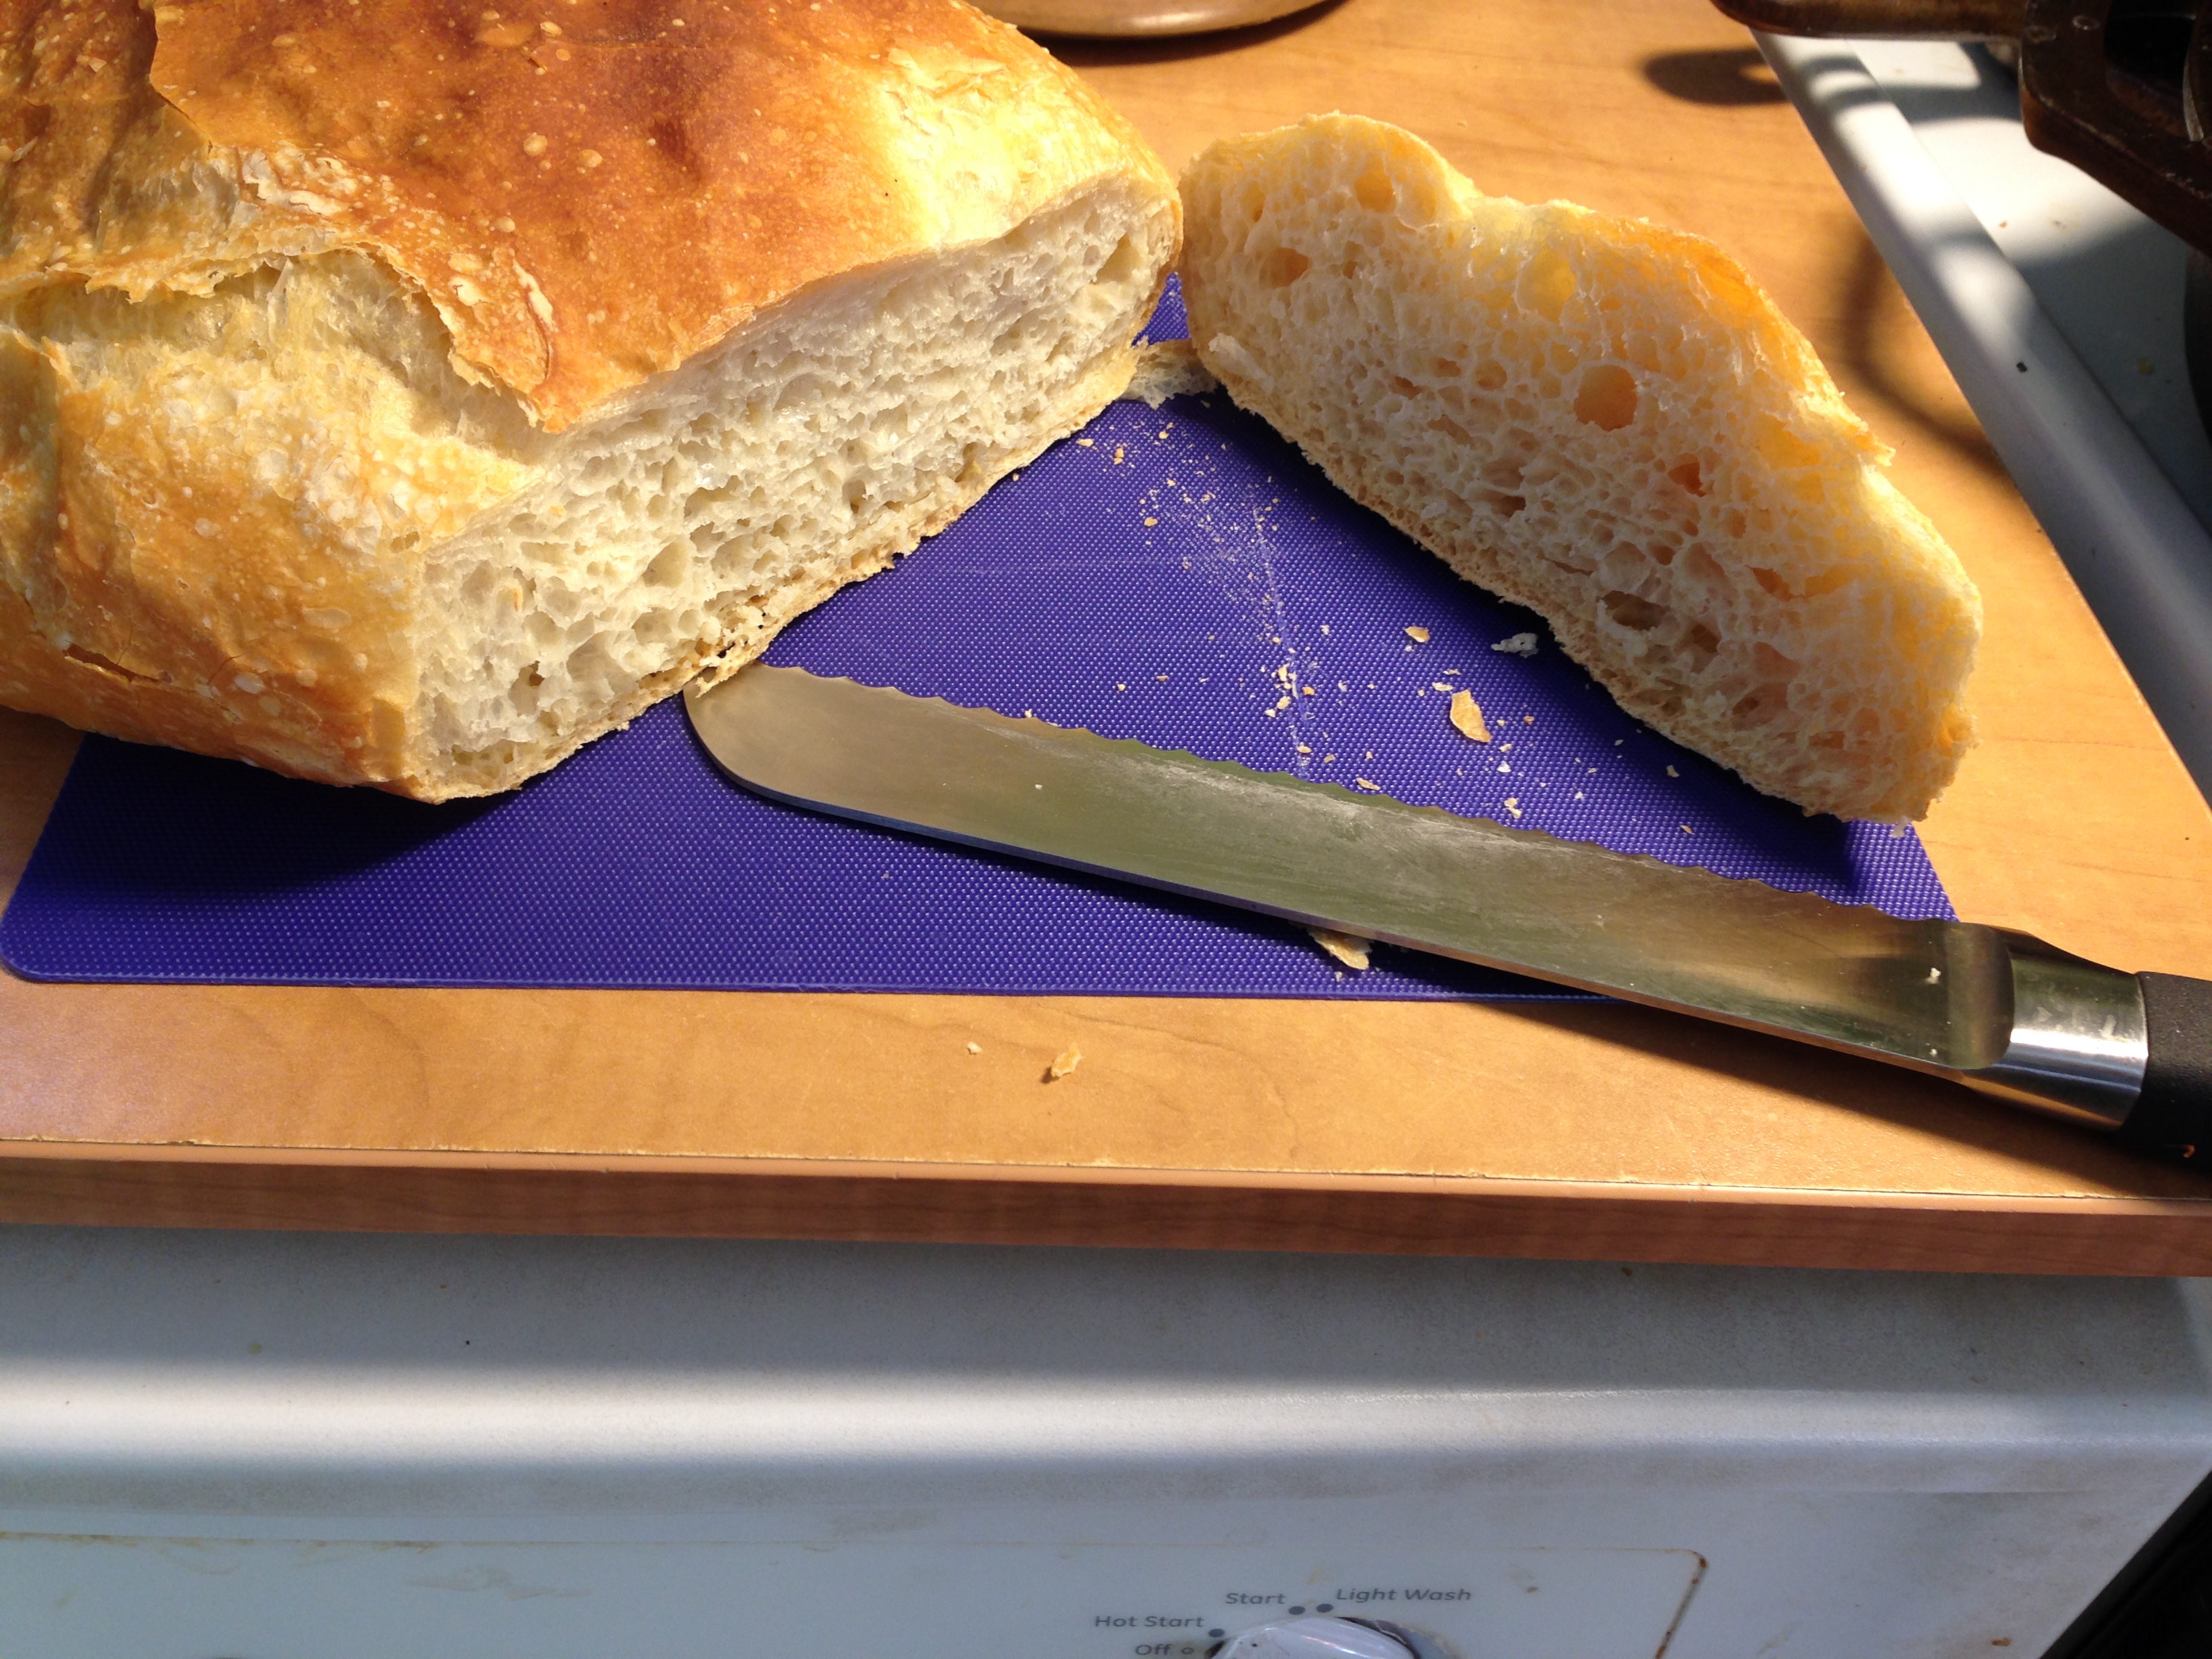
The final product was truly amazing. The crust is crispy, the middle is chewy and full of holes. It has a beautiful translucent crumb, much like a ciabatta. For pennies worth of ingredients, a little patience, and the effort to drag out an under-utilized tool this recipe makes a loaf as good as the expensive “artisanal” breads you can buy at snobby bakeries! Mr. Food It Yourself noted it is the best bread we have ever made. I do not know if I will ever be one of those people who makes all their own bread. However, I will have a really hard time justifying the purchase of a $6.00 boule when I can make one so easily.

Looks good, right? Use the corners of the parchment to move that beauty to a cooling wrack.
Seriously, you should make this bread. It will change the way you think about your own baking skills. Give it a try and let me know how it went in the comments section. Or, share your favorite thing to make with a Dutch oven.
Mr. Food It Yourself suggested this would make really good french toast. I think it would make amazing croutons, also.

Pingback: KITCHEN